May 6, 2026
# min Read


Explore expert insights, practical guides, and proven strategies to help you build, scale, and optimize high-performing digital experiences.
There's a certain kind of product update that doesn't make headlines, but makes your day a little better every time you open a browser. Webflow's latest favicon update is exactly that.
Launched on May 5, 2026, the update brings two meaningful changes to how favicons work inside Webflow - auto-resizing and dark mode support. Let's break down what actually changed and why it matters.
If you've managed Webflow sites for a while, you know the drill. You'd get a logo file from a client, open a favicon generator tool, download a zip, sort through the sizes, figure out which one goes where, upload it, and pray it looked okay in the browser tab.
Multiply that by a dozen client sites and it's the kind of low-grade friction that eats up time without anyone noticing - until you're knee-deep in 192×192 PNG files at 11pm.
One Upload. Every Size. Done.
The new behavior is refreshingly simple. You upload a single square image inside Site Settings, and Webflow automatically generates every size the site needs:
Accepted formats include PNG, JPG, GIF, ICO, and SVG. If you upload an SVG, Webflow converts it to PNG automatically to keep things compatible across browsers.
No plugins. No external tools. No more favicon-generator.org tabs open at midnight.
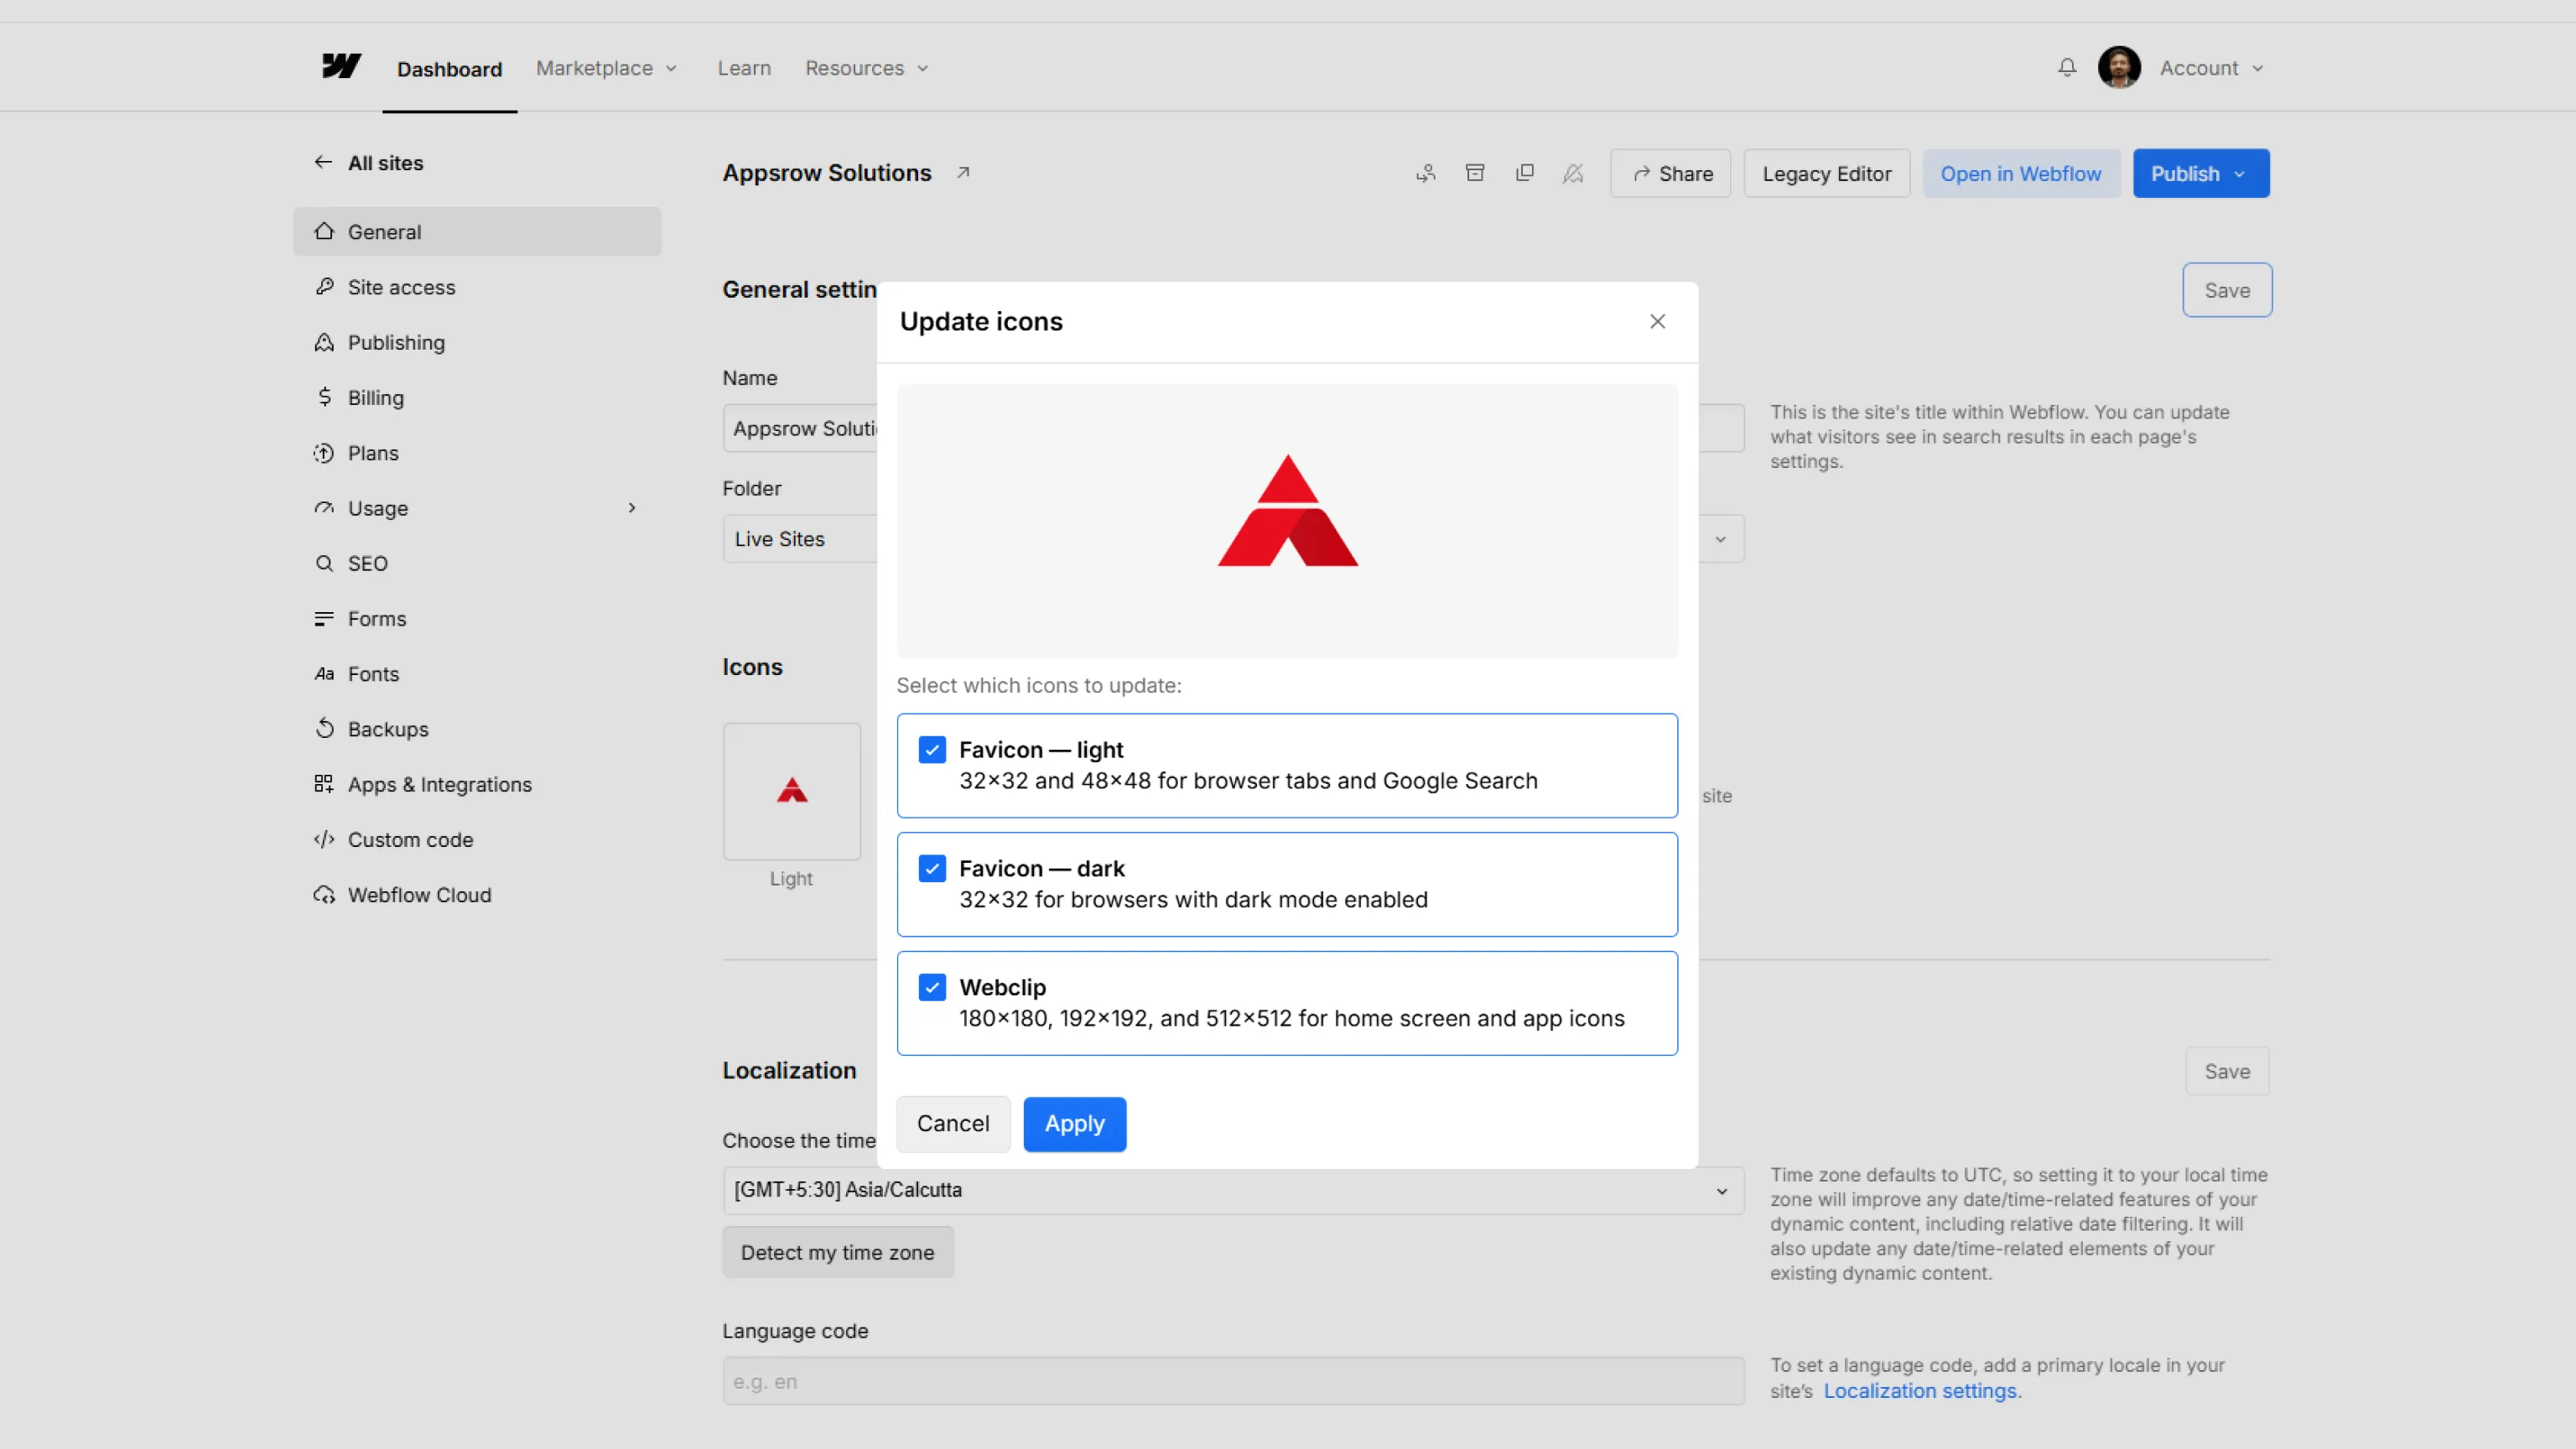
This is the part I think will matter most to designers who care about brand details.
Here's the problem: a lot of logos are designed with a white or light-colored icon. On a light browser tab, that's fine. But switch to dark mode - which a huge portion of users now prefer - and your favicon either vanishes or looks muddy against the dark chrome.
Webflow now lets you upload a second favicon specifically for dark mode. The platform uses the browser's prefers-color-scheme media query to detect which theme the visitor is using and serve the right version. So your light logo gets shown to light mode users, and your dark-mode-optimized icon shows up for everyone else.
The dark mode favicon option appears in Site Settings once you've uploaded your primary (light theme) favicon. It's optional - but for anyone serious about brand consistency across different environments, it's worth spending five minutes on.
Google uses a 48×48 favicon when displaying search results. That little icon next to your URL in the search listing is part of how users visually identify your site - especially when they're scanning through multiple results.
Previously, you had to make sure you'd specifically uploaded the right size for this to render correctly. Now, Webflow generates the 48×48 size automatically as part of the new favicon pipeline. No extra steps.
It's a small thing, but brand presence in search results adds up over time.
Bridges both layers via Shopify's Storefront GraphQL API
Shopify is one of the strongest commerce engines available, but its theme system can restrict design flexibility. Webflow offers complete visual control, but lacks deep commerce capabilities.
The real advantage comes from combining both. By using Shopify's Storefront API with Webflow as the frontend layer, you create a headless architecture where design and commerce operate independently, without compromise.
Shopify's default storefront uses Liquid templates. While reliable, it binds your frontend tightly to Shopify's rendering system. This makes advanced UI interactions, animations, and non-standard layouts difficult to implement.
Webflow removes those constraints. It outputs clean HTML, CSS, and JavaScript, allowing full control over layout and interaction design.
The Storefront API bridges the gap. It exposes Shopify's data layer through GraphQL, allowing Webflow to dynamically render products, collections, and carts.
Key benefit: You no longer have to choose between design freedom and commerce reliability. This architecture gives you both, without a dedicated backend in most implementations.
The system works as follows:
This removes the need for a backend in most implementations.
The Storefront API token is safe for public frontend use. It only exposes read access to products and write access to cart operations. Sensitive admin operations remain behind Shopify's protected Admin API.
Start by generating a Storefront API token from your Shopify admin under Apps > Develop apps. This token is safe for frontend use and allows access to product and cart operations.
The core of the integration is a reusable GraphQL request function:
storefront.js
const SHOPIFY_DOMAIN = 'your-store.myshopify.com';
const STOREFRONT_TOKEN = 'your-storefront-access-token';
async function storefrontQuery(query, variables = {}) {
  const res = await fetch(`https://${SHOPIFY_DOMAIN}/api/2024-04/graphql.json`, {
    method: 'POST',
    headers: {
      'Content-Type': 'application/json',
      'X-Shopify-Storefront-Access-Token': STOREFRONT_TOKEN,
    },
    body: JSON.stringify({ query, variables }),
  });
  const { data } = await res.json();
  return data;
}
This function becomes the backbone of all data interactions throughout the integration.
Instead of storing products in Webflow CMS, data is fetched directly from Shopify and injected into the page. Using custom data- attributes keeps the system stable and independent from Webflow's class naming conventions.
product-render.js
function renderProduct(product) {
  if (!product) return;
  document.querySelector('[data-product="title"]').textContent = product.title;
  document.querySelector('[data-product="description"]').textContent = product.description;
}
In your Webflow design, add custom attributes to any element. For example, set data-product="title" on a heading element and the script will populate it automatically on page load.
Always use data- attributes rather than class names to target elements. This way your JavaScript stays completely independent from any future design changes in Webflow.
The cart is created once and stored locally in the browser. This allows it to persist across page navigation without requiring a session or backend.
cart.js
async function getOrCreateCart() {
  let cartId = localStorage.getItem('cart_id');
  if (!cartId) {
    const data = await storefrontQuery(CREATE_CART, { lines: [] });
    cartId = data.cartCreate.cart.id;
    localStorage.setItem('cart_id', cartId);
  }
  return cartId;
}
Products are added to the cart using variant IDs, giving you full control over cart behavior and UI presentation.
+36%
average improvement in conversion rate reported by stores that implemented a slide-in cart drawer instead of a full page redirect to the cart.
Shopify variants are combinations of options like size and color. Instead of relying on default dropdowns, you can create fully custom UI elements such as buttons, swatches, or image selectors. Each selection maps to a specific variant ID.
variants.js
function buildVariantSelectors(variants) {
  const variantMap = {};
  variants.forEach((v) => {
    const key = v.selectedOptions
      .map((o) => `${o.name}:${o.value}`)
      .sort()
      .join('|');
    variantMap[key] = { id: v.id, available: v.availableForSale };
  });
  return variantMap;
}
When a customer selects options, you build the same key string and look up the matching variant ID from the map. This enables fully custom product interactions with zero dependency on Shopify's default UI components.
A slide-in cart drawer keeps users on the page and consistently improves conversion. The UI is built and animated entirely in Webflow, while Shopify manages the underlying cart data.
Checkout security: Never attempt to build a custom checkout. Always redirect to Shopify's checkoutUrl returned by the cart object. Shopify handles PCI compliance, fraud detection, and payment processing.
Collections can be loaded directly from Shopify instead of duplicating data in Webflow CMS. This ensures product data stays consistent and reduces maintenance overhead significantly.
Avoid syncing products into Webflow CMS. Any time a product updates in Shopify, your CMS becomes stale. Fetching live from the Storefront API means your frontend always reflects the true state of your catalog.
When implemented correctly, this headless setup is consistently faster than traditional Shopify themes. A few key practices keep it that way.
defer so they do not block the initial page renderfaster average page load compared to default Shopify Liquid themes, when the headless stack is correctly optimized with caching and deferred loading.
This architecture removes the traditional tradeoff between design and functionality. You get complete control over the frontend while relying on Shopify for a stable, scalable commerce backend.
For modern ecommerce brands that care about experience as much as performance, this is no longer an alternative approach. It is the direction the industry is moving toward.
Content has become the backbone of modern websites. Whether it is blogs, landing pages, or product descriptions, consistent and high-quality content directly impacts visibility and conversions. However, creating and managing content at scale remains a major challenge.
By integrating Webflow with Claude AI, businesses can automate content creation, streamline workflows, and scale faster without compromising quality. This guide explains how to build a complete automation system using these tools.
Webflow is a visual development platform with a flexible CMS, while Claude AI is an advanced language model capable of generating and optimizing content. Together, they create an automated pipeline where content is generated, processed, and published efficiently.
The process starts with a trigger such as a keyword or scheduled job. Claude AI generates structured content, and the backend pushes it into Webflow CMS using APIs. This allows continuous content creation without manual effort.
Install required dependencies:
npm install axios dotenvConfigure environment variables:
CLAUDE_API_KEY=your_claude_api_key
WEBFLOW_API_KEY=your_webflow_api_key
COLLECTION_ID=your_collection_id
const axios = require('axios');

async function generateContent(topic) {
  const response = await axios.post(
    'https://api.anthropic.com/v1/messages',
    {
      model: 'claude-3-opus-20240229',
      max_tokens: 1500,
      messages: [
        {
          role: 'user',
          content: `Write a detailed SEO blog on ${topic}`,
        },
      ],
    },
    {
      headers: {
        'x-api-key': process.env.CLAUDE_API_KEY,
      },
    },
  );

  return response.data.content[0].text;
}
async function publishToWebflow(content, slug) {
  await axios.post(
    `https://api.webflow.com/collections/${process.env.COLLECTION_ID}/items`,
    { fields: { name: slug, slug: slug, 'post-body': content, _draft: false } },
    { headers: { Authorization: `Bearer ${process.env.WEBFLOW_API_KEY}` } },
  );
}
(async () => {
  const topic = "Webflow automation";
  const content = await generateContent(topic);

  if (content) {
    await publishToWebflow(content, "webflow-automation");
  }
})();
Automation becomes powerful when applied at scale. You can loop through multiple keywords or topics and generate content for each automatically. This approach is ideal for SEO-driven strategies.
async function optimizeContent(content) {
  return await generateContent(`Improve SEO:\n${content}`);
}
async function updateContent(id, updated) {
  await axios.patch(
    `https://api.webflow.com/collections/${process.env.COLLECTION_ID}/items/${id}`,
    {
      fields: { "post-body": updated }
    },
    {
      headers: {
        Authorization: `Bearer ${process.env.WEBFLOW_API_KEY}`
      }
    }
  );
}
Use structured prompts for consistent results. Validate AI-generated content before publishing. Implement error handling and monitor API usage. Maintain brand voice across all outputs.
AI-generated content may require refinement. API limits can affect scaling. Quality control and duplication checks are essential for maintaining standards.
Automating content creation in Webflow using Claude AI allows businesses to scale efficiently and reduce manual effort. By building structured workflows and integrating AI into CMS processes, you can create a system that continuously generates and improves content.
This approach represents the future of web development, where automation and intelligence work together to deliver better results faster.
Websites are evolving rapidly. A few years ago, most websites were static marketing assets. Today, businesses expect websites to generate leads, personalize experiences, automate workflows, and continuously optimize performance.
This shift is pushing companies toward AI-powered systems, and one of the most practical combinations in 2026 is Webflow with Claude AI.
Webflow provides a modern visual development platform with a flexible CMS and clean front-end capabilities. Claude AI introduces intelligent automation, advanced content generation, workflow assistance, and decision-making support.
Instead of managing every task manually, businesses can now automate large portions of content operations and customer interaction.
The result is a scalable website ecosystem where marketing teams can move faster without significantly increasing operational costs.
In this article, we will explore ten powerful ways businesses are using Webflow and Claude AI together in 2026.
Publishing consistent content is one of the biggest challenges for growing brands. Content teams often spend hours researching, structuring, editing, formatting, and uploading articles manually.
Claude AI dramatically reduces this workload by generating structured blog drafts automatically. Once generated, the content can be pushed directly into Webflow CMS using APIs or automation tools.
This creates a scalable publishing pipeline that allows businesses to increase publishing frequency without increasing team size.
const axios = require("axios");

async function generateBlog(topic) {
  const res = await axios.post(
    "https://api.anthropic.com/v1/messages",
    {
      model: "claude-3-opus-20240229",
      max_tokens: 1200,
      messages: [
        { role: "user", content: `Write a blog on ${topic}` }
      ]
    }
  );

  return res.data.content[0].text;
}
Most teams still add a human review step before publishing, but the time savings are significant.
Creating individual landing pages for cities, campaigns, services, or audience segments manually can quickly become expensive and time-consuming.
Claude AI solves this by generating customized content variations automatically while Webflow templates maintain design consistency.
Businesses can create hundreds of targeted landing pages using a single design structure.
async function createLanding(city) {
  return await generateBlog(`Landing page for ${city}`);
}
This approach is especially valuable for local SEO campaigns, paid advertising funnels, and service-based businesses targeting multiple markets.
Content performance declines over time if it is not updated regularly. Search engines prioritize freshness, relevance, readability, and user engagement.
Claude AI can continuously analyze and optimize existing content by improving structure, keyword usage, readability, clarity, and formatting.
async function optimize(content) {
  return await generateBlog(`Improve SEO:\n${content}`);
}
Instead of manually auditing hundreds of pages, businesses can automate large-scale content optimization workflows.
Not every lead has the same intent level. Some users are ready to buy, while others are simply gathering information.
Claude AI can analyze Webflow form submissions and classify leads based on urgency, purchase intent, budget indicators, or business requirements.
async function classifyLead(msg) {
  return await generateBlog(`Classify lead:\n${msg}`);
}
This helps sales teams prioritize high-quality opportunities and respond more efficiently.
Modern users expect websites to feel relevant to their needs. Generic messaging often reduces engagement and conversions.
Claude AI enables businesses to dynamically personalize website copy for different visitor segments.
For example, startups, enterprise buyers, agencies, and developers can all see different homepage messaging based on their profile or traffic source.
async function personalize(type) {
  return await generateBlog(`Homepage for ${type}`);
}
This level of personalization creates stronger user engagement and improves conversion rates.
Managing large CMS collections manually becomes difficult as websites scale.
Claude AI can process hundreds of CMS entries and update descriptions, summaries, formatting, SEO metadata, or category structures automatically.
for (const item of items) {
  const updated = await optimize(item.content);
  await updateCMS(item.id, updated);
}
This is especially useful for directories, marketplaces, blogs, documentation websites, and enterprise CMS systems.
Customer support and lead engagement are major operational challenges for growing businesses.
Claude AI can be integrated directly into Webflow websites as an AI-powered support or sales assistant.
The chatbot can answer questions, guide users, qualify leads, and assist customers in real time.
fetch("/api/chat", {
  method: "POST",
  body: JSON.stringify({ message: userInput })
});
This reduces support workload while improving customer response speed.
Writing optimized SEO metadata for hundreds of pages manually is repetitive and time-consuming.
Claude AI can generate SEO-friendly title tags, meta descriptions, OG tags, and social snippets automatically.
generateBlog("Generate SEO metadata");This helps maintain consistency across large websites and improves search visibility.
Expanding into international markets usually requires extensive localization work.
Claude AI simplifies this process by translating and adapting content for different regions and languages.
generateBlog("Translate content into Spanish");Beyond direct translation, AI can localize tone, messaging, and formatting for regional audiences.
As websites grow, maintaining content quality becomes increasingly difficult.
Claude AI can analyze website content and identify outdated information, weak SEO structure, readability issues, and formatting inconsistencies.
generateBlog("Audit this content");This transforms content management from a reactive process into a proactive optimization system.
The combination of Webflow and Claude AI represents a major shift in how websites are built and managed.
Instead of relying entirely on manual workflows, businesses can now automate content generation, personalization, optimization, lead management, and customer interaction.
As AI technology continues to evolve, intelligent websites will become the standard rather than the exception.
Businesses that adopt AI-assisted workflows early will gain significant advantages in speed, scalability, and operational efficiency.
Integrating Webflow with Claude AI means enabling an AI model to interact directly with your website’s content and structure. Instead of manually editing CMS entries or publishing new pages, you can delegate these tasks to an AI system.
This interaction is enabled through three key layers:
Together, these layers allow Claude to perform actions such as:
The simplest method is using the built-in connector available inside Claude. This approach does not require coding and is designed for quick setup.
Once connected, Claude gains controlled access to your Webflow workspace. You can instruct it using prompts, and it will perform actions such as creating blog posts or updating content.
This approach works well for teams that want speed without dealing with backend infrastructure.
For more advanced use cases, Webflow provides support through the Model Context Protocol server. This setup enables continuous interaction rather than isolated API calls.
With MCP, Claude can maintain context and perform ongoing operations such as bulk updates, live edits, and workflow automation.
This approach is suitable for large projects where content is updated frequently or dynamically.
The most flexible approach is building your own backend that connects Claude AI with Webflow APIs. This gives you complete control over how data flows and how automation is handled.
You can define custom workflows, implement validation logic, and integrate additional services.
Start by creating a Node.js environment. This backend will act as the bridge between Claude and Webflow.
mkdir ai-webflow-projectcd ai-webflow-projectnpm init -yInstall required dependencies:
npm install axios dotenv
Create a .env file to store sensitive credentials securely.
CLAUDE_API_KEY=your_claude_api_keyWEBFLOW_API_KEY=your_webflow_api_keyCOLLECTION_ID=your_collection_idKeeping API keys outside your source code is critical for security.
The first step in automation is generating content using Claude AI. This is done by sending a structured request to the Claude API.
const axios = require('axios');
async function generateContent() {
  const response = await axios.post(
    'https://api.anthropic.com/v1/messages',
    {
      model: 'claude-3-opus-20240229',
      max_tokens: 1200,
      messages: [
        { role: 'user', content: 'Create a detailed article about AI-driven websites in 2026' },
      ],
    },
    { headers: { 'x-api-key': process.env.CLAUDE_API_KEY, 'Content-Type': 'application/json' } },
  );
  return response.data.content[0].text;
}This function sends a prompt and retrieves generated text. You can customize the prompt to control tone, structure, and output length.
After generating content, the next step is pushing it into your Webflow CMS.
async function publishContent(content) {
  await axios.post(
    `https://api.webflow.com/collections/${process.env.COLLECTION_ID}/items`,
    {
      fields: {
        name: 'AI Generated Article',
        slug: 'ai-generated-article',
        _archived: false,
        _draft: false,
        'post-body': content,
      },
    },
    {
      headers: {
        Authorization: `Bearer ${process.env.WEBFLOW_API_KEY}`,
        'Content-Type': 'application/json',
      },
    },
  );
}This API call creates a new CMS item and publishes it instantly.
You can now connect both steps into a single automated process.
(async () => {
  const content = await generateContent();
  if (content) {
    await publishContent(content);
    console.log('Content successfully published');
  } else {
    console.log('Content generation failed');
  }
})();This script demonstrates a complete automation pipeline from content generation to publishing.
Webflow forms can be extended with AI to process and analyze user input. Instead of simply storing submissions, you can extract insights and automate responses.
For example, when a user submits a form, the data can be sent to your backend, processed by Claude, and classified based on intent or urgency.
Classify this lead as high, medium, or low priority based on intentThis allows you to build intelligent systems such as:
If you need continuous interaction between Claude and Webflow, you can use the MCP server.
Install the server:
npm install -g @webflow/mcp-server
Start the service:
webflow-mcp startOnce connected, Claude can interact with your Webflow project in real time, enabling continuous updates and dynamic workflows.
Generate and publish content without manual intervention, reducing dependency on content teams.
Build landing pages automatically based on campaigns or user behavior.
Analyze existing content and improve it for better performance and SEO.
Update large datasets quickly using automated scripts.
Both APIs have request limits. You should implement batching or queuing.
AI responses may vary. Use prompt engineering to improve reliability.
Ensure tokens are valid and permissions are correctly configured.
AI-powered websites are moving toward full automation. Instead of managing individual pages or content pieces, developers will manage systems that continuously generate and optimize digital experiences.
The integration of Webflow with Claude is a step in that direction. It enables faster execution, smarter workflows, and scalable growth.
Connecting Webflow with Claude AI transforms how websites are built and maintained. It replaces manual processes with intelligent automation and opens the door to scalable content systems.
Whether you choose a simple connector or build a custom backend integration, the outcome is the same. You gain speed, efficiency, and the ability to operate at a scale that was previously difficult to achieve.
As AI continues to evolve, integrations like this will become a standard part of modern web development. Adopting them early gives you a strong advantage in building future-ready digital products.
Webflow has become the go-to platform for designers and brands that want pixel perfect control without writing a single line of code. From SaaS startups to creative studios, the platform is powering some of the most visually striking websites on the internet right now.
In this blog, we have handpicked 10 of the best Webflow websites based on design quality, user experience, animations, and overall creativity. Every description below reflects what these sites look like today, based on live verification.
Let us dive in.
Website: appsrow.com
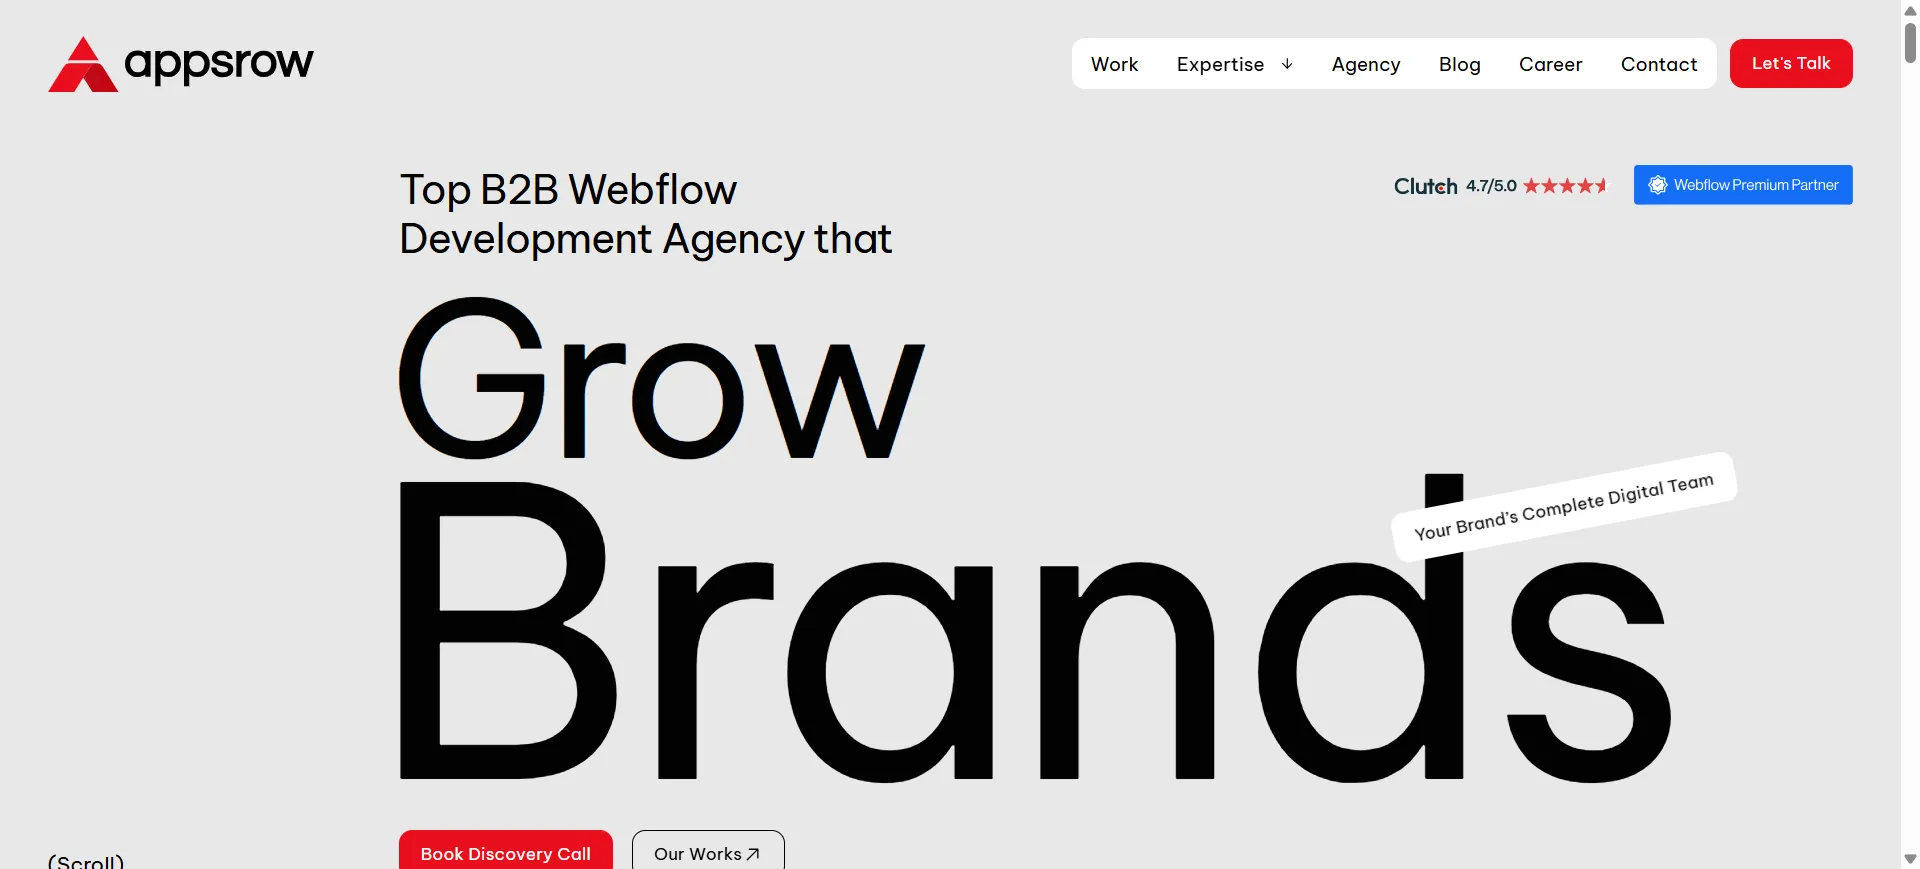
Appsrow is a Webflow Premium Certified Partner agency based in Ahmedabad, India, specializing in Webflow design and development for SaaS brands, startups, and modern businesses. Their own website is a showcase of everything they preach to clients.
What stands out:The current homepage leads with a bold headline, "Top B2B Webflow Development Agency that Grow Brands," paired with a full width hero video and strong trust badges (Clutch 4.7 rating, Webflow Premium Partner, Global Leader). The site uses scrolling rows of client logos across 28+ global brands, real project case studies with performance metrics visible (95+ speed, 100% accessibility), and testimonials from founders of actual client companies. The micro interactions and scroll based animations are restrained and purposeful, which is exactly how a Webflow agency site should feel.
Design takeaway: If you want visitors to trust your agency, your own website has to be your best work. Appsrow nails this with live proof points and zero fluff.
Website: anrok.com
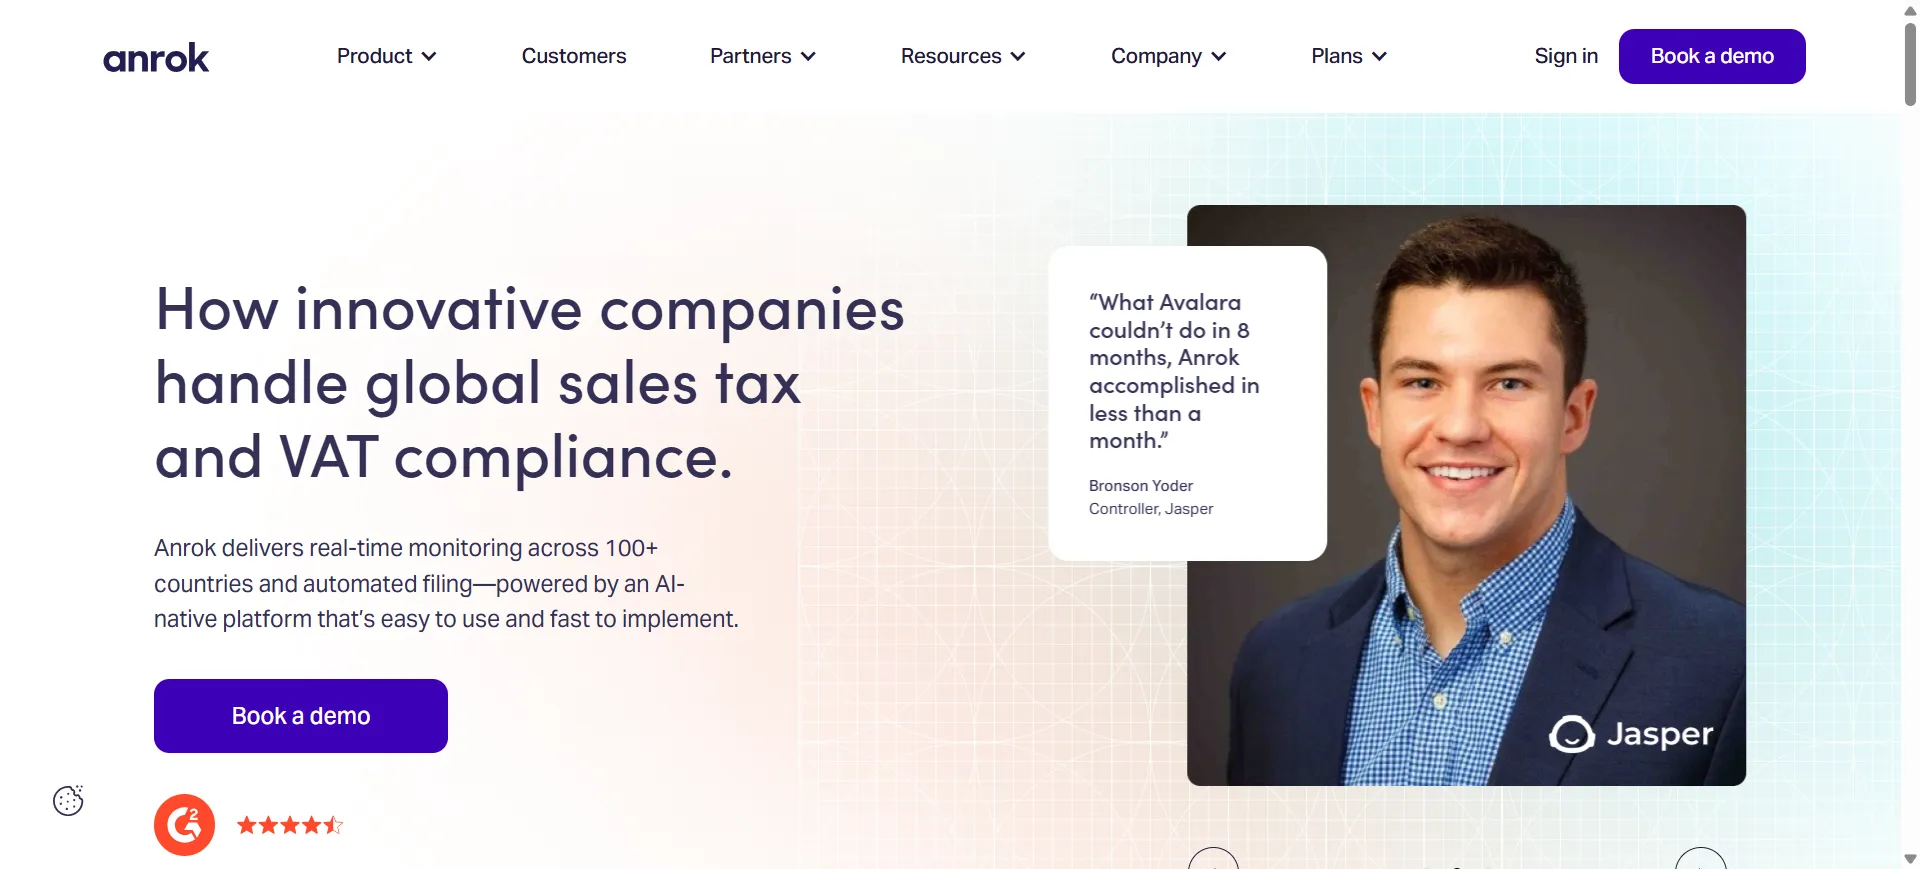
Anrok is a global sales tax and VAT compliance platform for modern SaaS companies. Their website turns a genuinely dry topic into something engaging through smart design choices.
What stands out:The current homepage opens with the headline "How innovative companies handle global sales tax and VAT compliance" and features Anrok Atlas, their new AI native tax interface, front and center. The site uses a clean type hierarchy, generous white space, and a striking scrolling strip of customer logos (Anthropic, Notion, Vanta, Cursor, Mercury, Cohere, and more). Customer quote cards with real photos build instant credibility. The restrained color palette keeps the focus on copy and product.
Design takeaway: White space plus high trust logos is a more effective combination than any animation.
Website: superlist.com
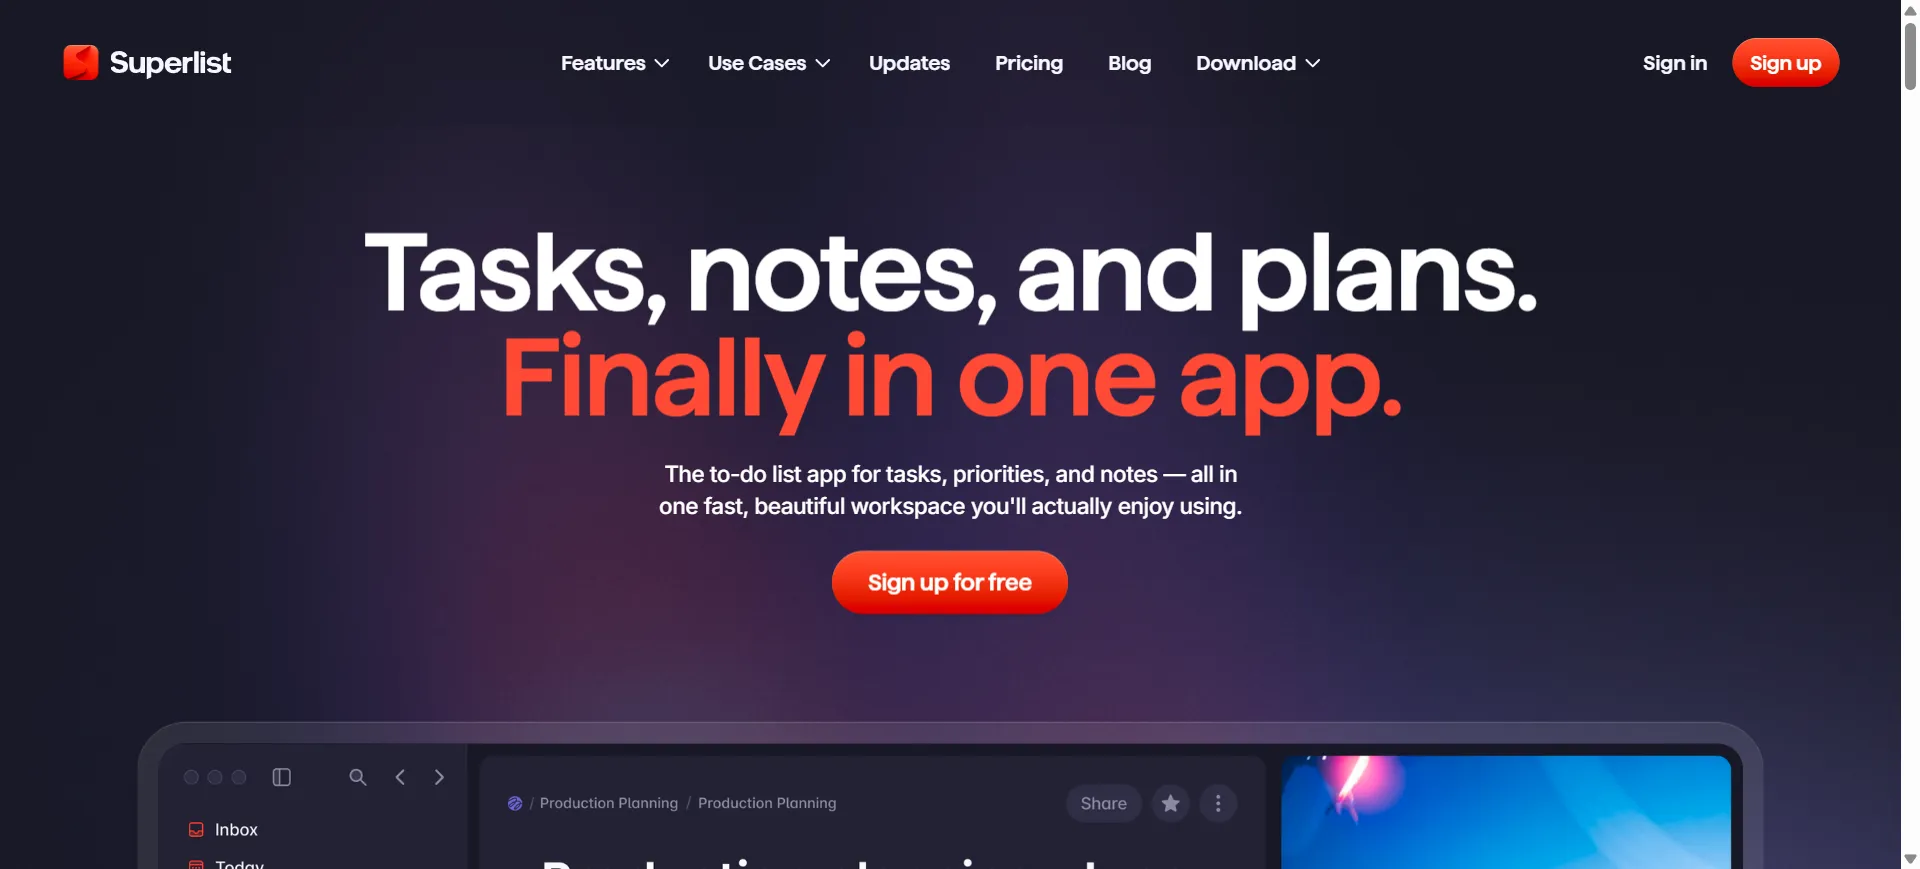
Superlist is built by the team behind Wunderlist and blends AI powered task management, meeting notes, and real time collaboration in one app.
What stands out:The homepage currently positions Superlist as the most beautifully designed task app of 2026. It uses a mix of polished product screenshots, playful color, and thoughtful micro interactions (the task completion sounds and toggle animations are famously delightful). Bold color blocks divide sections while the design system flexes between serious productivity and playful personality.
Design takeaway: You can be professional and playful at the same time if your design system is tight.
Website: rootly.com

Rootly is an AI native incident management platform that lives inside Slack. Their website is a standout example of the 2026 trend of treating product UI as gallery art.
What stands out:The product screenshots are placed against impressionist style painted backdrops, which elevates the software as something carefully crafted rather than mass produced. This contrast between modern SaaS UI and classical illustration is visually arresting and instantly memorable, and it is specifically called out in Webflow's own 2026 design trends roundup.
Design takeaway: Pair your product UI with an unexpected visual backdrop to make it feel premium and intentional.
Website: riverside.fm
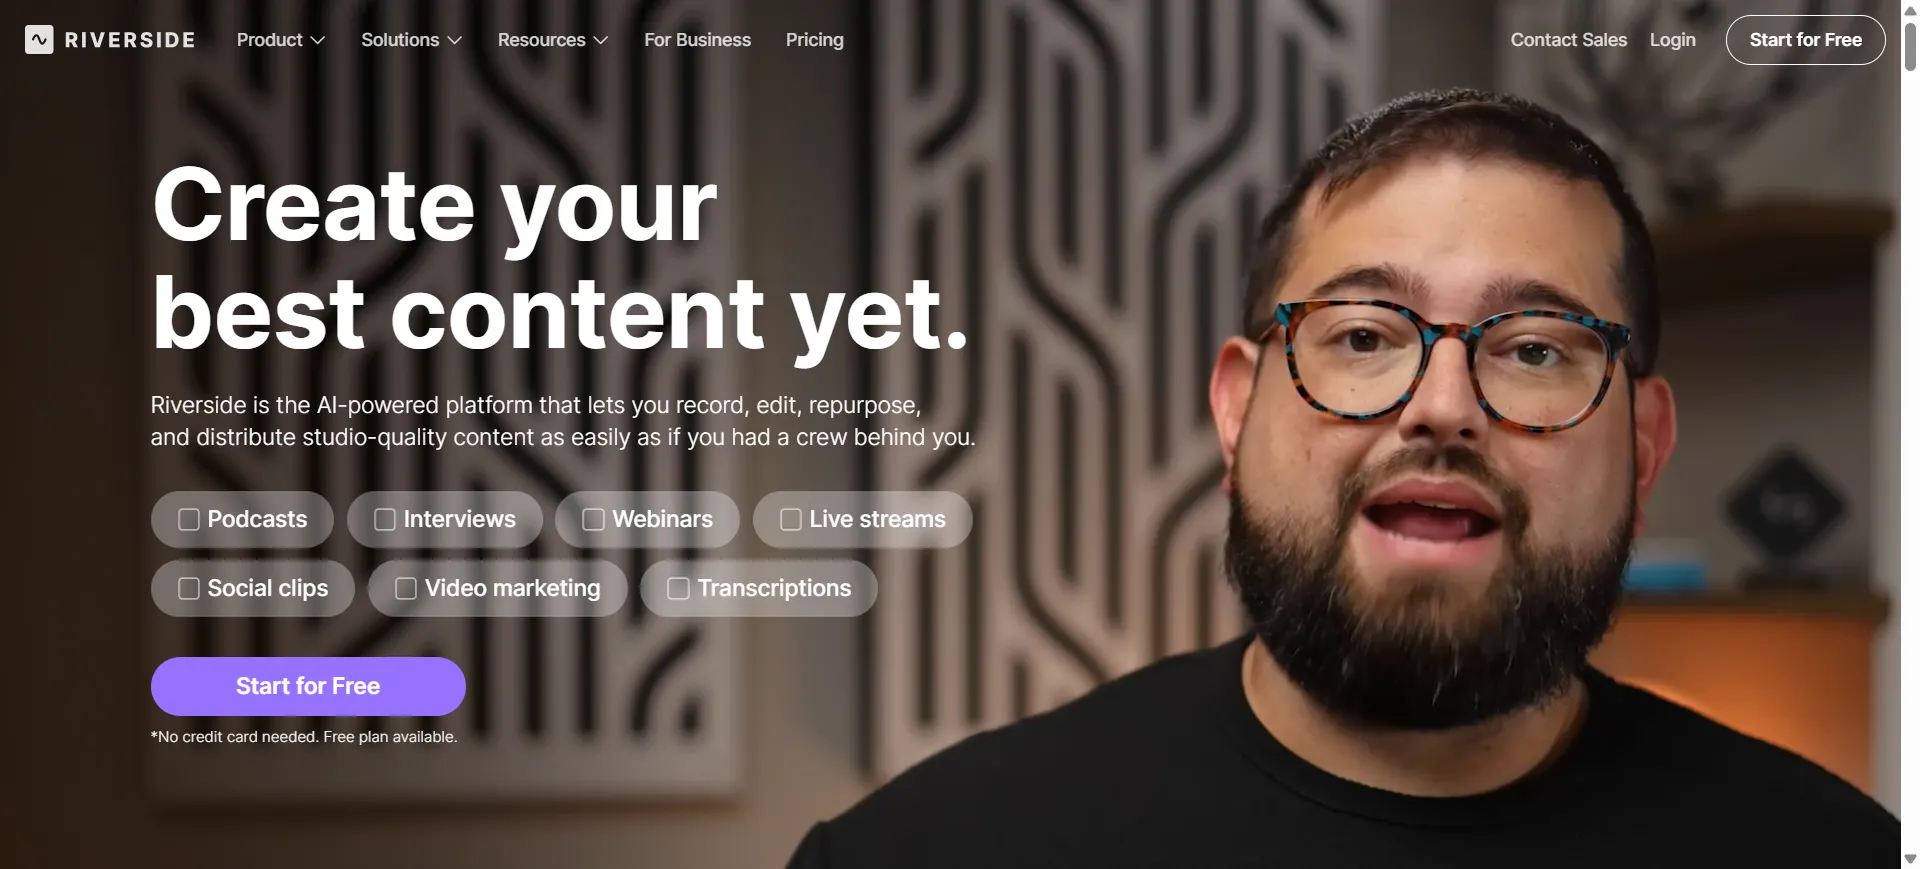
Riverside is a platform for recording high quality podcasts and video remotely. The website matches the professional vibe of its target audience, creators and podcasters.
What stands out:Riverside uses a dark theme punctuated by pops of accent color, which immediately communicates professionalism. The hero section features the platform in action, and trust signals like well known podcasters and brand logos are placed right below the fold to build credibility fast.
Design takeaway: Dark mode, when done well, signals premium and professional. Use it when your audience expects polish.
Website: modash.io
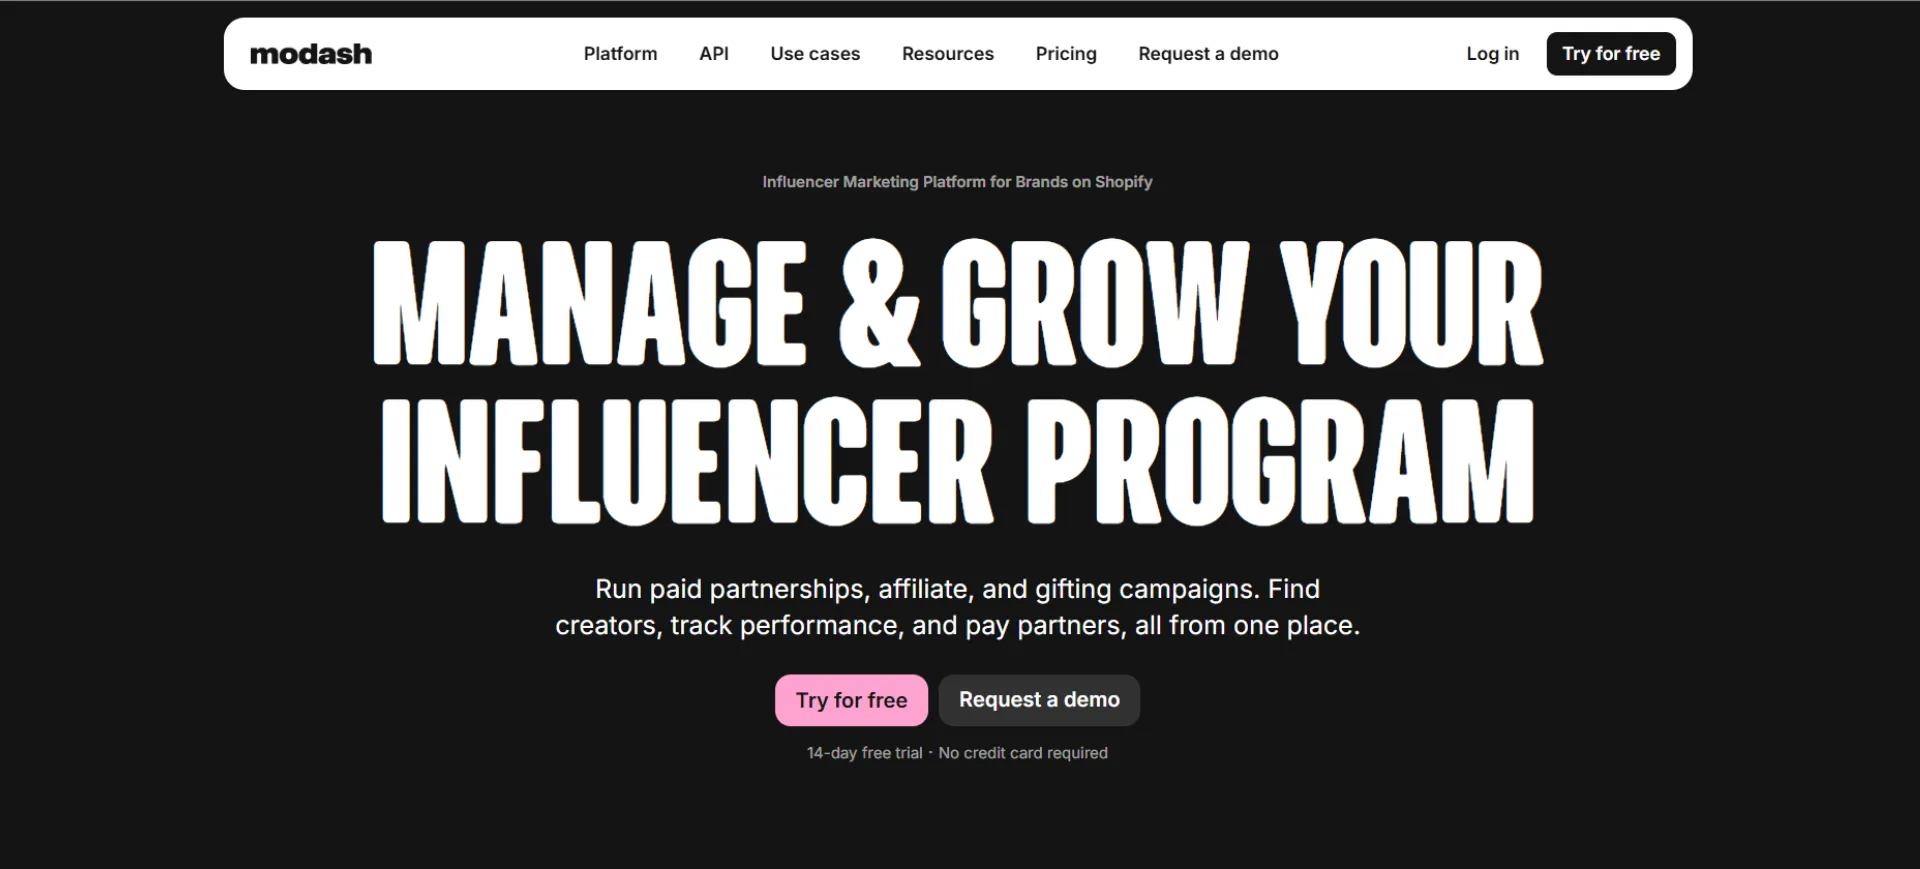
Modash helps marketing teams find and analyze influencers across Instagram, TikTok, and YouTube. With a database of 250 million plus profiles, the pressure was on to explain a complex product simply.
What stands out:The copy is direct and the visuals are informational without being cluttered. The team reportedly rewrote the hero section to be much simpler, and the click through rate doubled. The site uses clean layouts, real product screenshots, and testimonial sections that build trust without getting in the way of the main message.
Design takeaway: Simple copy beats clever copy. If users can tell what you do in three seconds, your design is working.
Website: nimbble.nl
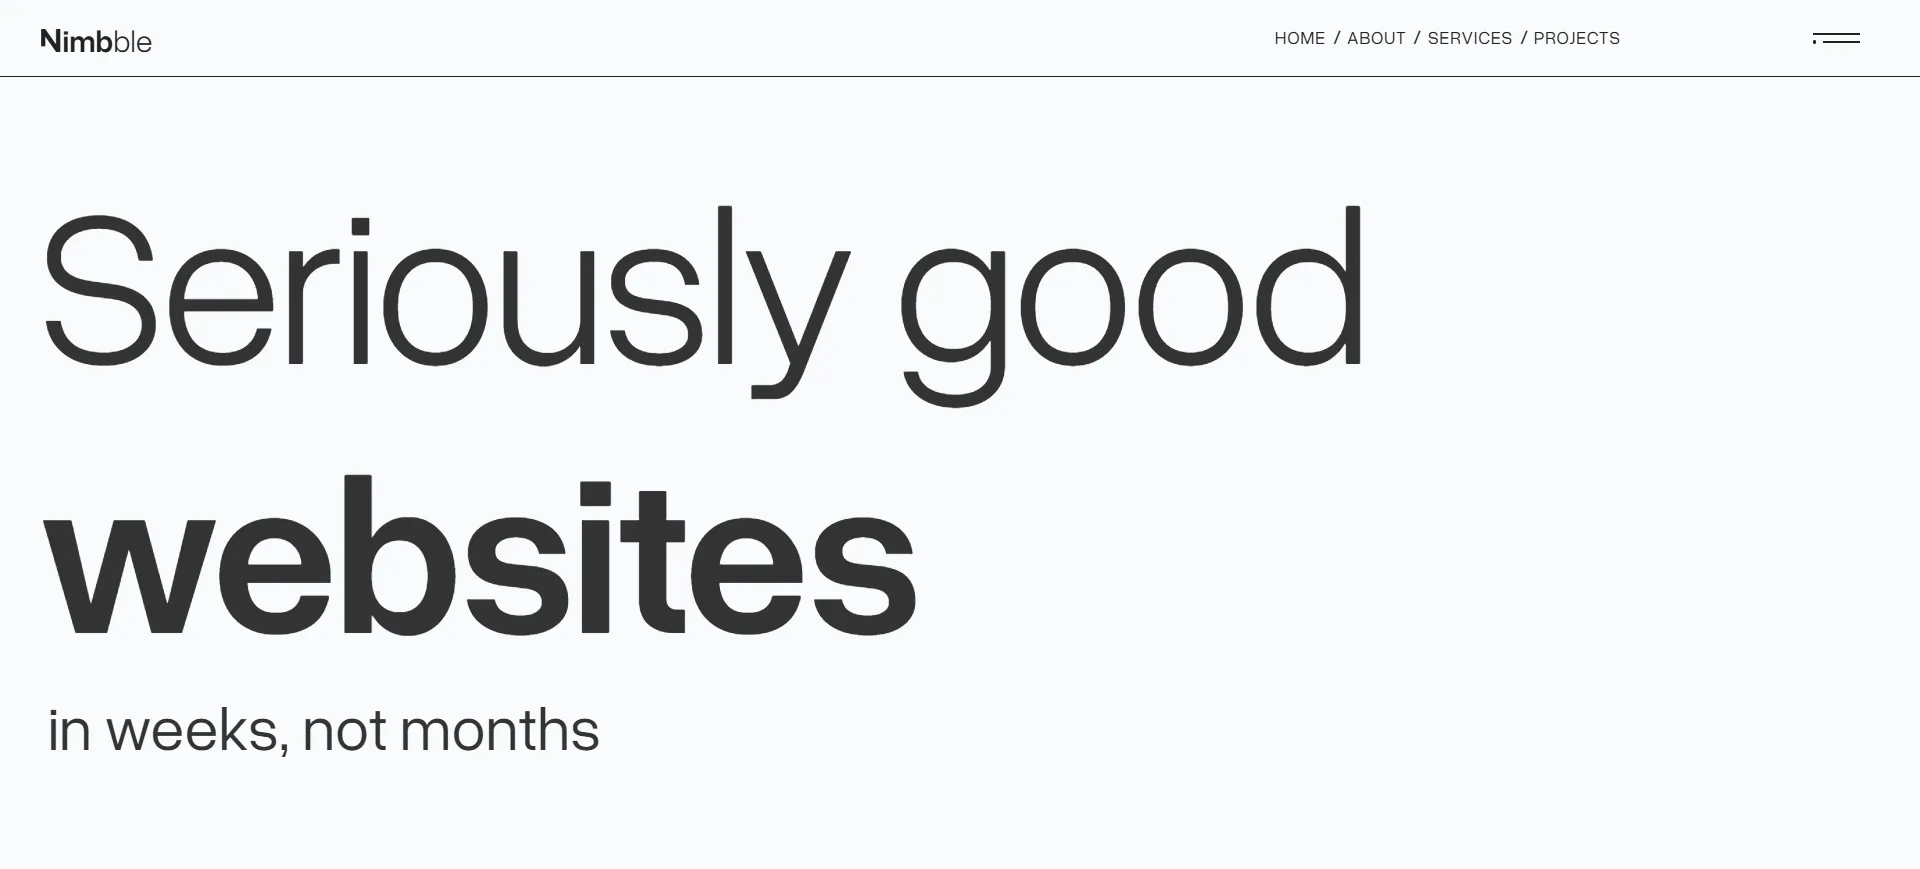
Nimbble is an Amsterdam based collective of digital designers and developers, best known for their own dark themed website that has appeared in Webflow showcases more than once.
What stands out:Their tagline, "Seriously good websites in all shapes and sizes," is delivered through bold outlined typography, scroll reveal content, and smooth animations that never get in the way of the message. The navbar transforms into a menu icon to create a cinematic viewing experience. They recently launched a revamped version of the site after it was featured in Webflow's own roundup of modern UI design, which tells you how seriously they take their own craft.
Design takeaway: When everyone else is using light mode, a bold dark design becomes a differentiator.
Website: faircraft.bio
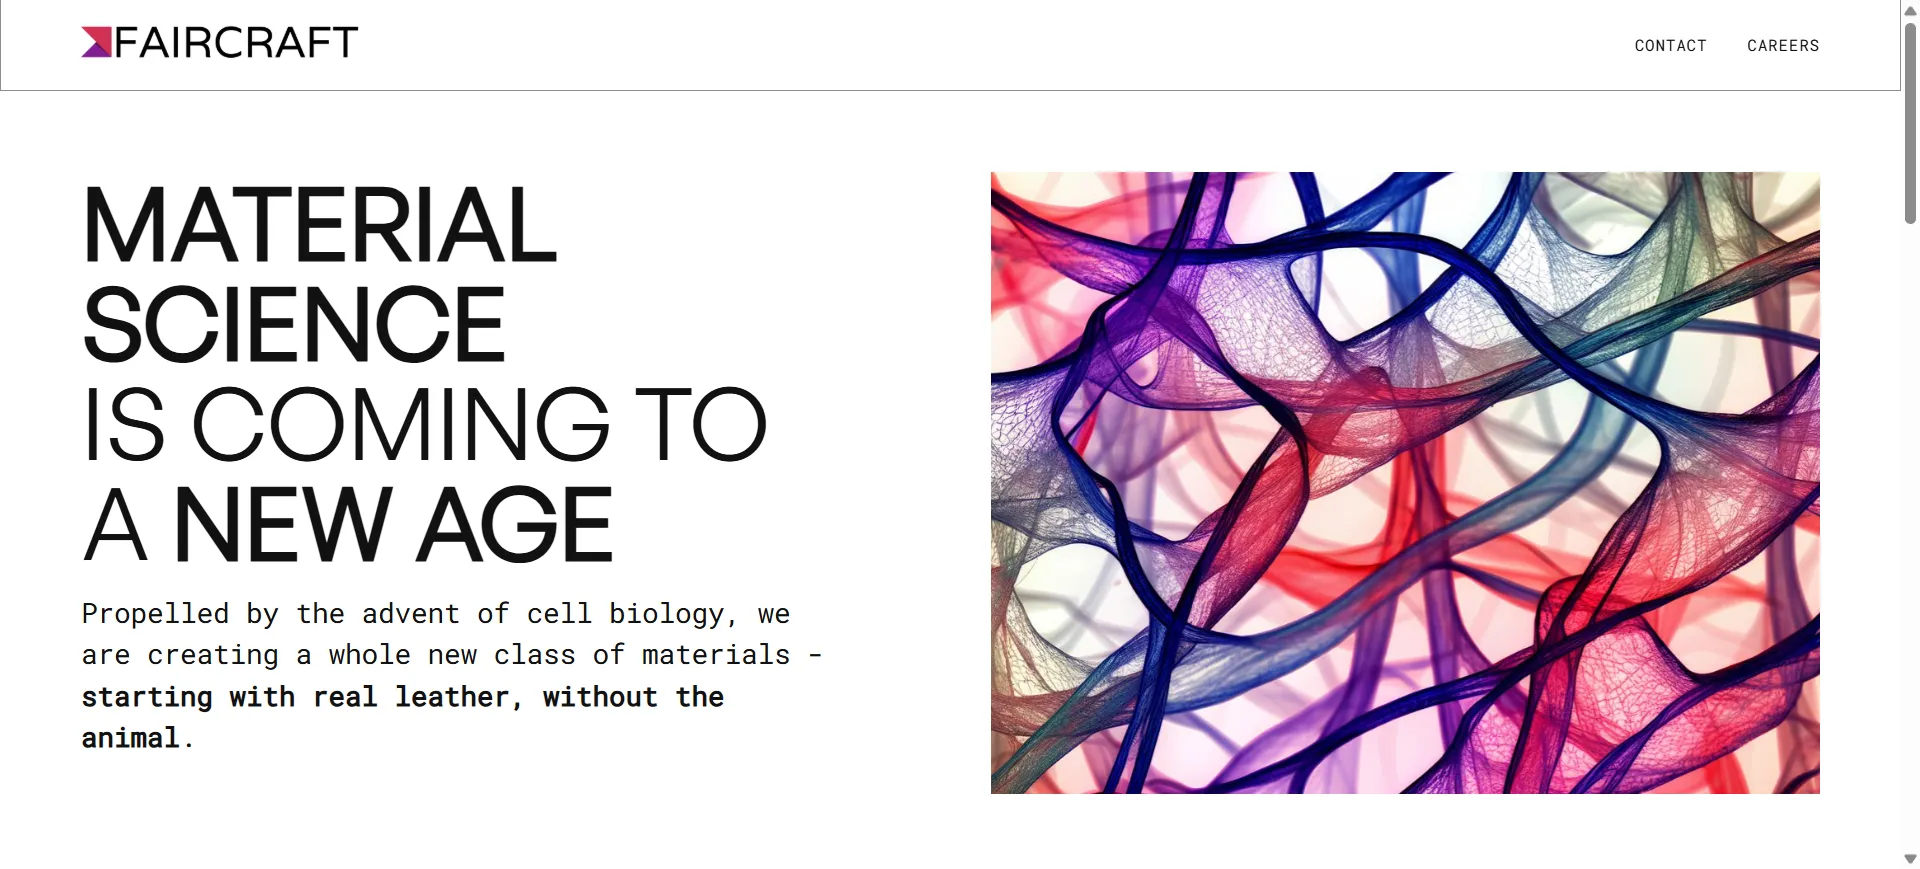
Faircraft is a Paris based biotech startup producing lab grown leather using tissue engineering. The website needs to communicate both science and luxury, which is a tough brief.
What stands out:The site leads with the line "Real leather, grown in a lab," supported by refined typography, earthy tones, and close up texture shots that almost let you feel the material through the screen. Scroll animations are subtle and never get in the way of the message. The result is a website that feels like a premium fashion brand and a research lab at once, which is perfect for a company working with Balenciaga, Loewe, and Stella McCartney.
Design takeaway: For brands in niche or technical industries, let your visuals carry the emotion while the copy handles the facts.
Website: thefurrow.webflow.io

The Furrow is an animation studio that describes itself as "the animation studio that provides a foundation for creativity to thrive." The website is a masterclass in restrained, confident design.
What stands out:The above the fold section is minimalist, almost sparse, but as you scroll the content opens up with rich visuals and smooth transitions. The site rewards exploration. A small black dot reveals the menu on hover, and a dark/light mode switcher is built in. Typography does most of the heavy lifting.
Design takeaway: A quiet hero section can be more powerful than a loud one if the rest of the site delivers on the promise.
Website: discord.com/blog

The engineering and product blog behind Discord is surprisingly one of the most recognizable Webflow sites in the wild.
What stands out:Bright colors, playful illustrations, and a clean layout make technical content feel approachable. The design leans heavily into Discord's brand personality, which could feel childish on another product but works perfectly here. Navigation is intuitive and the reading experience is genuinely enjoyable.
Design takeaway: Let your brand personality breathe, even in content heavy sections like blogs. Readers remember how a site felt, not just what it said.
The common thread across all 10 of these Webflow websites is intention. Every animation, every bit of spacing, every color choice is there for a reason. Great design is not about stuffing a page with effects, it is about removing everything that does not serve the user.
If you are planning to build or redesign your own Webflow site, study these examples. Pay attention to how they balance motion with readability, how they use white space, and how they guide the visitor through a story.
And if you want expert help bringing your own vision to life, Webflow Premium Partners like Appsrow combine strategy, design, and development under one roof so your site ends up in the next inspiration list, not just browsing one.
Running a Webflow site is rewarding, but the small recurring chores are what eat into your week. Pulling update logs, reviewing publish dates, checking content health, and sending status summaries to clients. Each task is minor on its own, but when you multiply them across several sites, the hours add up quickly.
This is where Webflow's MCP (Model Context Protocol) server changes the picture. Instead of clicking through dashboards every Monday morning, you can hand the repeatable work to an AI assistant and let it deliver the results on a schedule you define. In this article, we will walk through how this works, why it matters, and how a simple weekly reporting task can be fully automated.
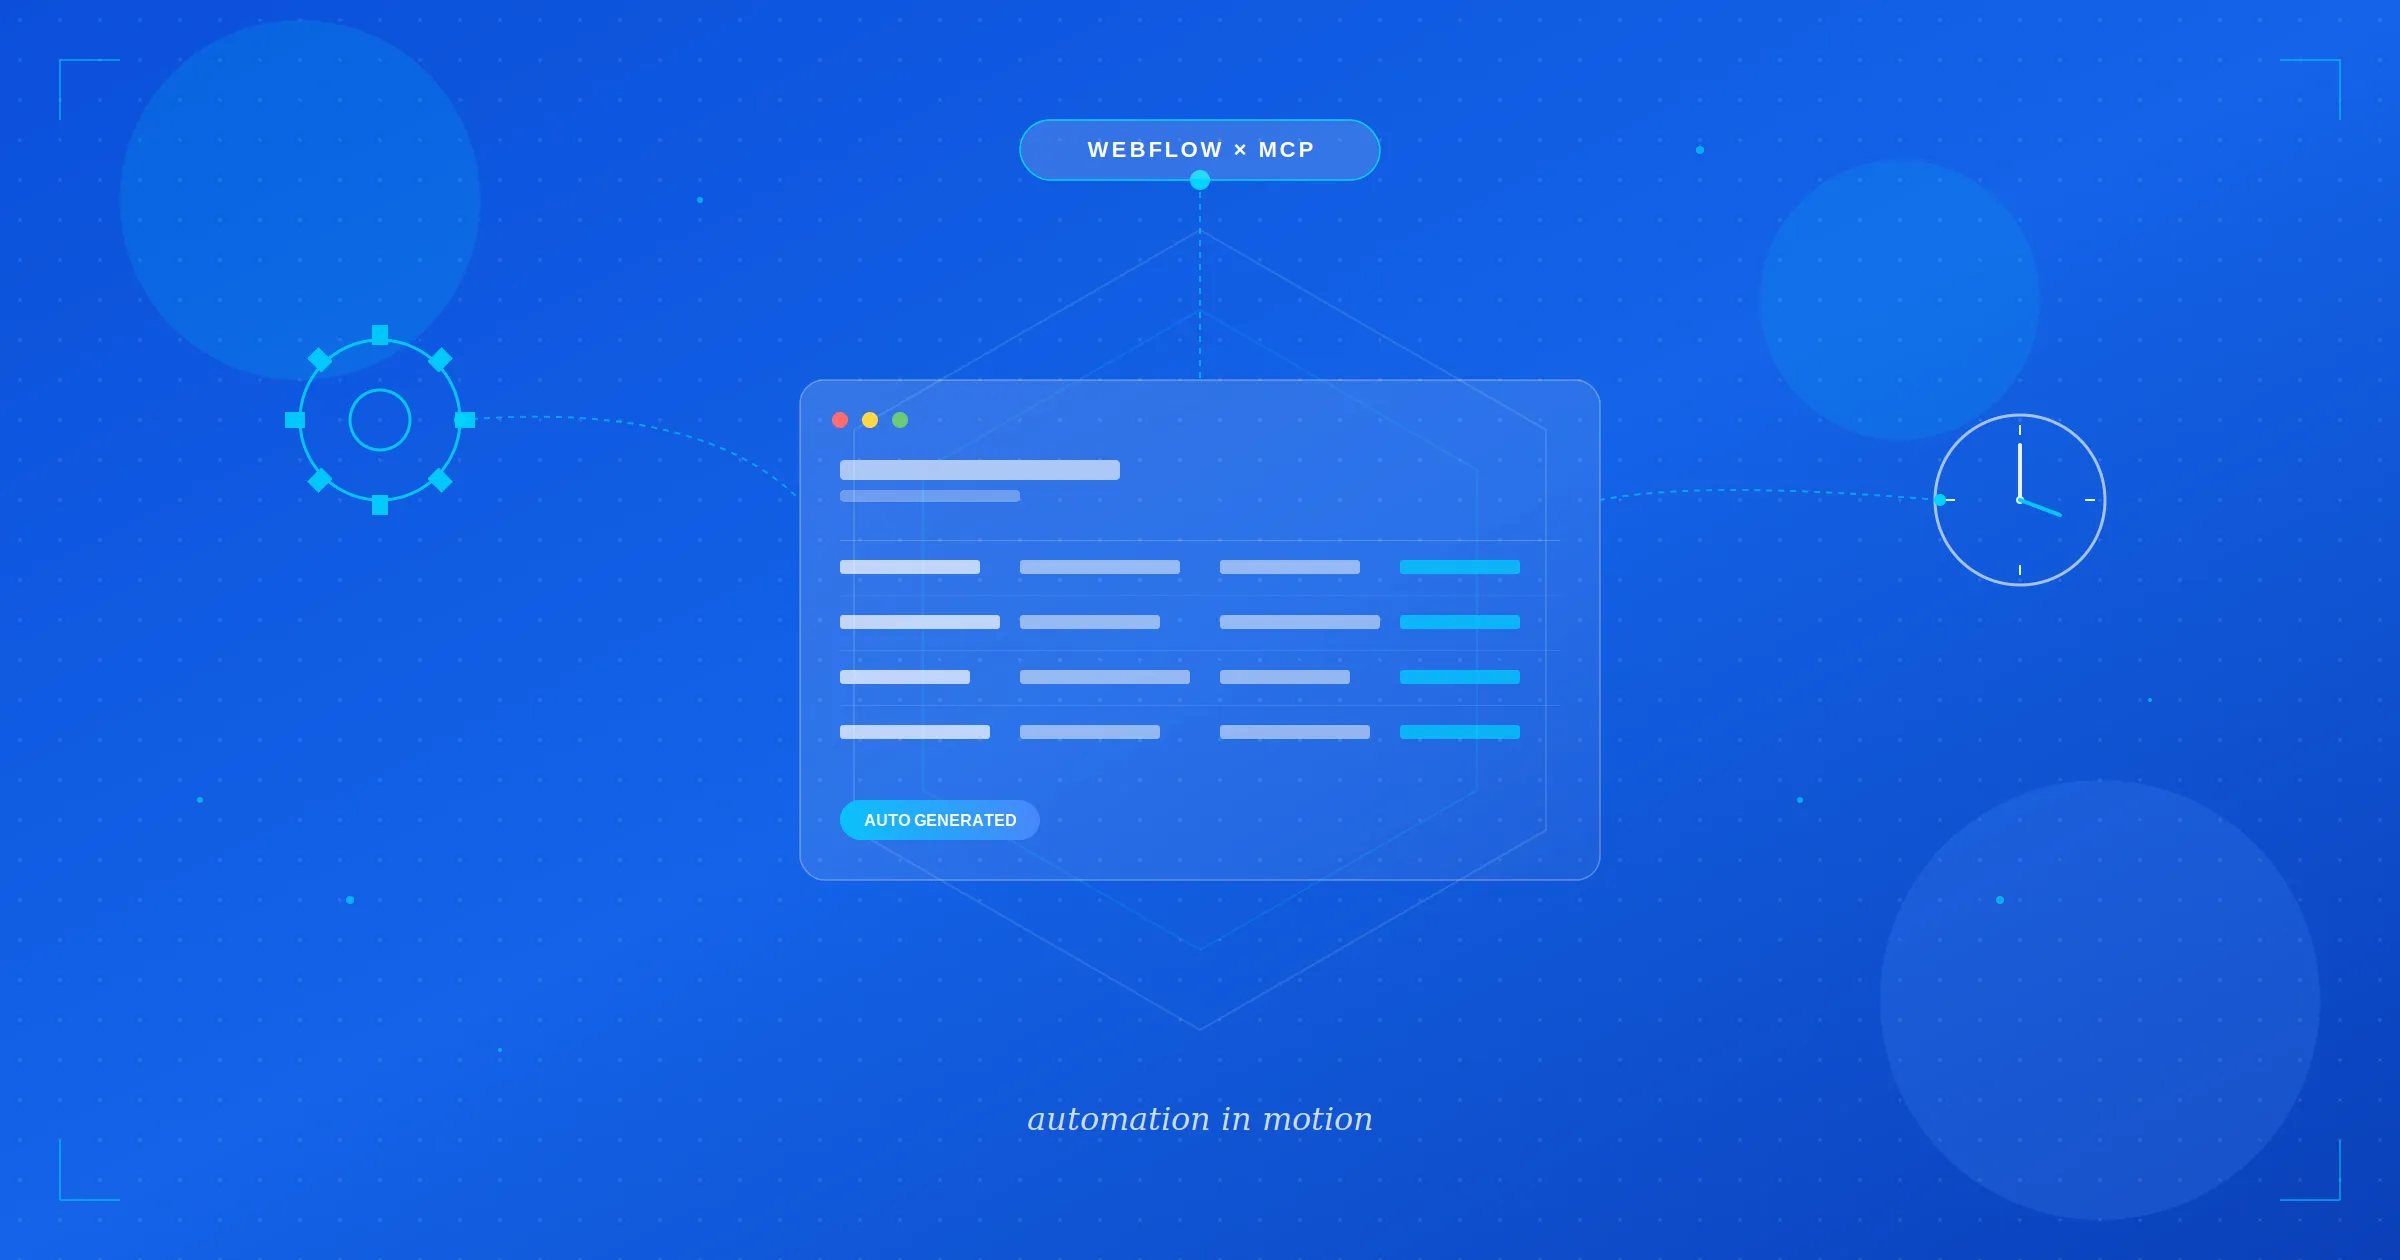
The MCP server acts as a bridge between your Webflow data and AI tools like Claude. It is not just a time saver. What makes it genuinely powerful is context. The AI gets direct access to real site information, which means it can answer questions, generate reports, audit content, and flag issues using live data rather than assumptions.
Some of the things you can do through MCP include:
The real shift happens when you combine this with scheduling. A one-time prompt is useful. A recurring workflow is transformative.
Claude Cowork expands the desktop app into a workspace where you can create scheduled tasks. You write a prompt once, pick a frequency, and let it run in the background. For Webflow site owners, agencies, and freelancers, this means your reports, audits, and checks happen on their own.
Think about a freelancer managing ten client sites. Without automation, that is ten logins, ten dashboards, ten summaries, every single week. With a scheduled MCP task, all of that becomes a single PDF sitting in a folder when work starts on Monday.
Let us walk through a real example. Imagine your client wants a simple weekly overview of all their Webflow sites. They are not asking for deep analytics. They want three pieces of information:
This is the kind of request that happens often in agency work, and it is a perfect candidate for automation.
Before scheduling anything, the prompt needs to produce good output on the first try. Here is a starting version:
Create a PDF report of my Webflow sites. The report should be a table including the Site Name, last updated, and last published values. Include the date and time the report was generated.
When this is run, the AI pulls live site data through the MCP server and builds a clean PDF. One small catch shows up immediately though. The times come back in UTC, which is not helpful if your client is in a different time zone. A quick adjustment solves this:
Create a PDF report of my Webflow sites. The report should be a table including the Site Name, last updated, and last published values. Include the date and time the report was generated. Use the CST or CDT time zone depending on which is currently active.
That last line matters. Daylight saving time can silently throw timestamps off by an hour if you do not account for it. Small details like this are what separate a polished report from one that raises questions.
Once the prompt runs cleanly, open the generated PDF and review it. Check the table formatting, confirm the dates look right, and make sure nothing is missing. At this stage, you can layer in more styling details if you want, for example specifying colors, fonts, or headers. Keep it simple at first. You can refine later once the automation is stable.
This is where Cowork takes over. Inside the Claude desktop app, switch to Cowork and open the Scheduled section. Create a new task and paste in the prompt. A good version for scheduling looks like this:
Create a PDF report of my Webflow sites. The report should be a table including the Site Name, last updated, and last published values. Include the date and time the report was generated. Use the CST or CDT time zone depending on which is currently active. Save the file using a timestamped name in the format webflow-site-report-MONTH-DAY-YEAR-HOUR-MINUTE.pdf. The date values should be generated dynamically based on the current time.
Now pick a frequency. Weekly on Monday at 7 AM works well for most client workflows. When you sit down at your desk, the report is already waiting.
There is one practical note worth remembering. If your computer goes to sleep, so does the scheduled task. Cowork does warn you about this, and there is a toggle to keep the machine awake during scheduled runs. If the report genuinely needs to land on time, enable it.
One of the best features of scheduled tasks is the ability to run them on demand. You do not have to wait seven days to see if your Monday report actually works. Click into the task, hit run, and verify the output. This is especially useful for infrequent jobs where a small prompt issue could go undetected for weeks.
A few observations from working with this setup:
Weekly reports are just the beginning. Once you understand the pattern, the same approach works for dozens of other recurring tasks:
Each of these can live as a scheduled task, quietly running in the background while you focus on design and strategy.
For anyone managing multiple Webflow sites, automation is not a luxury. It is the difference between spending Mondays on client updates and spending them on actual creative work. The MCP server combined with scheduled AI tasks gives solo operators the kind of reporting power that used to require a full operations team.
Clients get consistency. You get your time back. And the work that does need human judgment gets your full attention because the routine stuff is already handled.
If you are new to the Webflow MCP server, the best place to begin is the official developer documentation. Pick one repetitive task you do every week, write a prompt that handles it, test the output, then schedule it. Once you have one working automation, the rest follow naturally.
The broader point is this. Your Webflow sites do not need to be a constant source of small tasks. With the MCP server and a scheduling tool like Cowork, the routine work can run on its own while you focus on the parts of the job that actually need you.
At AppsRow, we specialize in helping businesses unlock the full potential of Webflow through expert design, development, and automation services. Our team brings deep experience in:
Whether you are a solo founder, a growing startup, or an established agency looking for a reliable Webflow partner, AppsRow has the expertise to ship work that looks great, loads fast, and scales with you.
Ready to put your Webflow sites on autopilot? Get in touch with AppsRow today and let us help you turn repetitive tasks into automated workflows.
Ahmedabad's design and tech scene is about to get a lot more interesting.
On Saturday, April 25, 2026, we're throwing open the doors to the city's very first Webflow Meetup. It's a morning built for designers, developers, freelancers, founders, and anyone curious about what's happening at the intersection of visual design and no-code development.
If you've ever wondered what Webflow really is, why agencies across the world are betting big on it, or how it's quietly becoming the go-to platform for teams that want fast, beautiful, conversion-ready websites, this meetup is for you.
Here's everything you need to know.
Ahmedabad has always been a city of builders. From manufacturing to startups to design studios, something is always being made here. But when it comes to the global web design conversation, the one happening in Webflow communities across New York, London, Berlin, and Bangalore, Ahmedabad hasn't quite had its seat at the table yet.
We want to change that.
At Approw, we've spent years working as a Webflow Premium Partner, building websites for brands across the globe. We've seen firsthand how Webflow has transformed the way businesses launch, scale, and market online. We've also seen how much talent exists right here in our own backyard, often without access to the communities and conversations that could 10x their careers.
This meetup is our way of starting that conversation. Locally. In person. Over coffee.
For the uninitiated, Webflow is a visual web development platform that lets you design, build, and launch fully responsive, production-grade websites without writing traditional code. Think of it as the creative power of a designer's tool combined with the structural control of clean, professional code.
It's the reason a solo freelancer can now deliver agency-quality websites. It's the reason founders can ship landing pages in hours instead of weeks. It's the reason agencies are scaling client work faster than ever before.
And it's a skill that's quickly becoming one of the most in-demand in the digital product world.
This isn't a conference. There's no stage, no keynote, no sales pitch. It's a community-first gathering designed around the one thing that actually matters at events like these: meaningful conversations.
Here's what the morning will look like.
Real stories from real practitioners. Hear from people who are actively building on Webflow, including freelancers, agency owners, and product teams, about what's working, what's not, and where the platform is heading.
Hands-on insights. Whether you're wondering how to pitch Webflow to a client, how to structure a CMS for scale, or how to transition from Figma to Webflow without losing your mind, you'll walk away with practical takeaways.
Connections that last. The best part of any meetup isn't the content. It's the people you meet. We're keeping the group intimate so you actually get to have real conversations, not just collect business cards.
Coffee. Good coffee. Because no meetup is complete without it.
We built this meetup for a wide range of folks, because the Webflow ecosystem touches all of them.
Web designers who are curious about going no-code and want to see what's possible. Developers exploring visual development workflows and wondering if the hype is real. Freelancers looking to level up their client offerings and charge more confidently. Agency owners scaling with Webflow and wanting to compare notes with peers. Founders and marketers who want better websites, faster, without the usual engineering bottlenecks. And students or aspiring creators ready to break into the design and tech industry.
If any of that sounds like you, you belong in the room.
Date: Saturday, April 25, 2026 Time: 10:00 AM to 12:00 PM IST Venue: DevX Coworking, 2nd Floor, BINORI B SQUARE-3, Sindhu Bhavan Marg, Bodakdev, Ahmedabad 380059 Entry: Free (but seats are limited)
Parking is easy, and you'll find Approw Webflow Meetup signage on the 2nd floor to guide you in.
Sandeepsingh Sisodiya is the Co-founder of Approw and a long-time Webflow Premium Partner. Sandeep has spent years helping global brands ship high-performing websites and has been watching the Webflow ecosystem grow from a niche tool into a global movement.
Parth Parmar is our co-organizer and a Webflow Community Builder, passionate about bringing the no-code movement to Ahmedabad and creating spaces where creators can connect.
Together, they're bringing the energy of the global Webflow community to Ahmedabad for the very first time.
Is the event really free? Yes, completely. We just ask that you register so we know how many seats and cups of coffee to plan for.
Do I need to already know Webflow? Not even a little. Whether you've never opened the Webflow Designer or you're shipping client sites every week, you're welcome here.
Will there be food? Light refreshments and coffee, yes. Come hungry for conversation.
Can I bring a friend? Please do. Just have them register separately so we have an accurate headcount.
Every design community, every tech scene, every creative movement starts the same way. A few people in a room, sharing what they know, building what they care about, and choosing to show up for each other.
That's what this meetup is. A first step. A beginning.
If you've been waiting for a sign to get more involved in the Webflow world, or just want to meet other people in Ahmedabad who care about great design and smart web building, this is it.
Seats are limited and filling fast.
See you on April 25th.
Approw is a Webflow Premium Partner helping brands around the world design, build, and scale high-performing websites. Learn more about us at approw.com.
The way teams build content-driven websites is changing fast. With AI-powered search, answer engines, and dynamic user experiences taking center stage, the demand for a smarter, more scalable CMS has never been higher. Webflow has answered that demand by rolling out its next-generation CMS to every customer, bringing enterprise-level capabilities to Starter, Business, and Ecommerce plans alike.
This update is not just another feature release. It is a complete architectural upgrade that redefines how designers, marketers, and developers can structure, connect, and display dynamic content on Webflow sites.
.webp)
For years, Webflow users who built complex, content-heavy websites had to work around certain platform limits. Whether it was nesting collection lists, handling multi-layered content relationships, or managing large datasets, there were ceilings that forced creative compromises. Those ceilings have now been lifted.
Here is what is new:
Expanded nested collections. Teams can now use up to 10 nested collection lists per page, a fivefold increase from the previous limit. Each nested list can hold up to 100 items, which is ten times the earlier cap.
Multi-level nesting up to three layers deep. Previously, designers could only go one level deep when connecting CMS data. Now, content relationships can extend through three layers, opening the door to far richer and more interconnected page structures.
Improved performance and reliability. Publish, backup, and restore operations are faster and more predictable, even for sites managing large volumes of structured data.
Better foundation for APIs and AI readiness. The underlying architecture is built to support upcoming enhancements in API access, data distribution, and AI-driven discovery.
Search is no longer just about keywords and rankings. AI-powered engines like ChatGPT, Perplexity, Google AI Mode, and Claude are actively crawling and citing websites based on how well their content is structured and interconnected.
A flat website with isolated pages tends to perform poorly in AI citations. What these engines reward is depth, context, and relationships between content pieces. When your services connect to case studies, which connect to team members, which connect to testimonials, the AI has enough context to understand and accurately represent your brand.
Webflow's next-gen CMS was engineered with this reality in mind. The expanded nesting and reference capabilities make it practical to build the kind of rich, semantically connected content architecture that AI engines favor.
The new flexibility is not theoretical. It directly translates into real-world improvements for the kinds of websites agencies and in-house teams build every day.
Content-heavy portfolio and agency sites. Linking project pages to service pages, case studies, and related work is now far more natural. Designers can build scalable templates without relying on custom workarounds.
Restaurant and hospitality brands. Menu pages with layered nutritional information, allergen tags, and ingredient details can now be structured in one clean, maintainable system.
SaaS and product marketing sites. Homepages can pull from multiple content sources such as features, integrations, testimonials, blog posts, documentation, and pricing tiers, all dynamically managed through the CMS.
Ecommerce and product catalogs. Product listings tied to categories, reviews, related items, and variant data can now be structured with less friction and more flexibility.
Multilingual and regional sites. With deeper CMS capabilities paired with locale-specific access control, regional teams can manage content-rich experiences within a single site architecture instead of maintaining multiple duplicate sites.
Early adopters have already started redesigning how they approach content architecture. Many have shared that the expanded design flexibility changes how they plan projects from the very first wireframe. Instead of designing around platform limitations, they can now design around the client's actual content needs.
For agencies, the shift means faster turnaround, more maintainable templates, and the ability to deliver complex content systems without writing custom code. For marketing teams, it means richer pages without having to wait on engineering resources.
Webflow has been clear that this release is a foundation, not a finish line. The new architecture sets the stage for further improvements in CMS scale, API performance, and AI discovery tools. As AI-driven search continues to shape how brands get found, Webflow is positioning itself as a platform built not just for today's websites but for tomorrow's content ecosystems.
For any business that cares about scale, design freedom, and visibility in an AI-first world, this upgrade is worth paying attention to.
At Appsrow, we specialize in helping brands, agencies, and product teams unlock the full potential of modern platforms like Webflow. With the rollout of the next-gen CMS, there is a real opportunity to rebuild how your site performs, scales, and gets discovered. Our team brings hands-on expertise across the following areas:
Webflow Development and Migration. We design and develop Webflow sites that take full advantage of the new CMS architecture, from multi-level nested collections to complex, content-rich templates. If you are on an older structure, we can audit your current setup and migrate you into a scalable next-gen CMS framework.
Custom CMS Architecture. We help teams plan and implement advanced content models, including interconnected collections, reference fields, and scalable page templates that are easy for non-technical teams to maintain.
AEO and AI-Ready Content Structuring. Our specialists structure your content so that it is discoverable, citable, and context-rich for AI engines like ChatGPT, Perplexity, Google AI Mode, and Claude. This includes schema planning, semantic linking, and content strategy aligned with answer engine optimization.
API Integrations and Headless Solutions. We build custom integrations between Webflow and your CRM, marketing tools, ecommerce stack, or mobile apps, giving you a true single source of truth for all your digital channels.
Performance, SEO, and Conversion Optimization. Beyond development, we focus on making sure your site loads fast, ranks well, and converts visitors into customers through thoughtful UX, analytics setup, and ongoing optimization.
Ongoing Support and Maintenance. Websites are not one-time projects. We offer continued support, new feature rollouts, and strategic guidance to keep your Webflow site aligned with your business growth.
If you are ready to explore what Webflow's next-gen CMS can do for your brand, our team at Appsrow is here to help you design, build, and scale without compromise.

From brand identity to Webflow development and marketing, we handle it all. Trusted by 300+ global startups and teams.
The Appsrow blog covers Webflow tips, design trends, development best practices, SEO strategies, and digital marketing insights. We share practical knowledge from our Webflow development and design projects, offering actionable content created by experienced professionals who understand real-world challenges and solutions.
Appsrow publishes new blog articles regularly, typically multiple times per month covering various Webflow and web development topics. Our content often relates to Webflow SEO strategies and industry trends, maintaining a consistent publishing schedule that provides fresh, valuable content for our community of readers.
Yes, you can subscribe to receive notifications when Appsrow publishes new blog content via email or RSS feed. Subscribers get early access to valuable insights about Webflow design trends, development techniques, and exclusive content. Staying subscribed ensures you never miss important updates and expert tips.
Appsrow occasionally accepts high-quality guest posts from industry experts on relevant topics. We maintain strict quality standards to ensure content provides genuine value to our readers. Guest contributors from SaaS companies or agencies must demonstrate expertise and align with our content guidelines and editorial standards.
Yes, all Appsrow blog articles are optimized following best practices including keyword research, meta optimization, and structured content. We practice what we preach about Webflow SEO, and our blog serves as both an educational resource and demonstration of our expertise in content marketing and search optimization.
Absolutely! Appsrow encourages sharing our blog content on social media platforms to help others benefit from the information. Each article includes social sharing buttons, and articles about AI industry trends or Webflow tips often perform well on platforms like LinkedIn and Twitter within professional communities.
Yes, Appsrow occasionally publishes case studies showcasing successful client projects and results achieved. These real-world examples demonstrate our capabilities including Webflow migration success stories and provide practical insights into our methodology, approach to solving specific challenges, and quantifiable business outcomes.
Yes, Appsrow welcomes content suggestions from readers and considers them for future articles. We value community input and want to address topics that matter most, whether about conversion optimization techniques or Webflow best practices. Your suggestions help us create more relevant and valuable content.
Appsrow creates content for various skill levels, from beginners to advanced users, with clear indication of difficulty. Our tutorials include step-by-step instructions for Webflow design and development, with screenshots and practical examples making complex topics accessible without oversimplifying important concepts.
The Appsrow blog provides actionable insights that help improve your website, marketing efforts, and online presence. You can learn best practices for Webflow development, stay updated on industry trends, and discover solutions to common challenges, helping businesses make informed decisions about their digital strategies.
.webp)
.webp)
.webp)
.webp)
.webp)
.webp)


